
Once again, that familiar lightness is floating in the air.
And my brain is bursting with the possibilities of SPRING on the homestead.
The birds have started chirping, there’s the faintest green tint to the prairie when you look out across the wide open space, and the air smells alive and fresh after many months of BLAH. Are we done with snow storms? No way. But we’re getting closer.
I can feel it.
I repotted the tomatoes and peppers this week, and they’re happily growing under their lights in the basement. I’ll start the cabbage, Brussels sprouts, and broccoli seeds in a few days, and plans are in the works to haul in a ginormous load of mulch for the pathways in the garden, among about a half dozen other projects. (Will we ever learn to not overload ourselves with projects? Hmmm… probably not.)
Since the raised beds are mostly complete this year (minus my mulch walkways, and possibly the craziest hail protection system you’ve ever seen– more on that later), my main garden goal this year is to garden with intention and aim for quality over quantity.
Also. I’m trying not to kill stuff. That’s good, right?
I’m still feeling a little gun-shy after accidentally poisoning my garden several years ago, and I came pretty darn close to disaster again this spring without even realizing it.
Good grief, Jill.
Thankfully, soil testing saved the day. Hallelujah.
I’ve thought about having our garden soil tested in the past, but was never quite organized enough to do it before the growing season started. And so I skipped it year after year.
After a friend brought me a container and instructions from the Colorado State University Soil Testing Laboratory this year, I decide to just go for it.

When we built our raised beds last year, we filled them with a mixture of well-aged compost and topsoil that was left over after we leveled the garden plot. As haphazard as it was, it worked, and we had a spectacular growing season last year. However, since our soil is contained in beds, I know it’s more important than ever to be conscious of the amendments we’re using, and also to be mindful of ensuring nutrients do not become depleted.
Not only did having our soil tested this year help me to narrowly miss creating another huge problem in my garden by adding too much compost, I now know exactly how to amend my soil (no guessing games) for the upcoming growing season. Also. I’m rather proud of myself for being proactive instead of flying by the seat of my pants (now to just master that concept in all the other areas of my life…)

Where to Get Your Soil Tested
There are tons of DIY soil tests floating around on Pinterest and such, but they have mixed reviews and seem to be mostly ineffective. Plus, most of them just check for pH, which really is only a teeny part of the information you really need to know if you’re really wanting to understand the health of your soil.
Check your local county extension for recommendations, but if you’re having trouble finding a lab that tests soil locally, the following laboratories will test mail-in samples:
There are many others out there as well–these aren’t the only ones by any means. My test cost $35 plus postage and it was worth every penny.
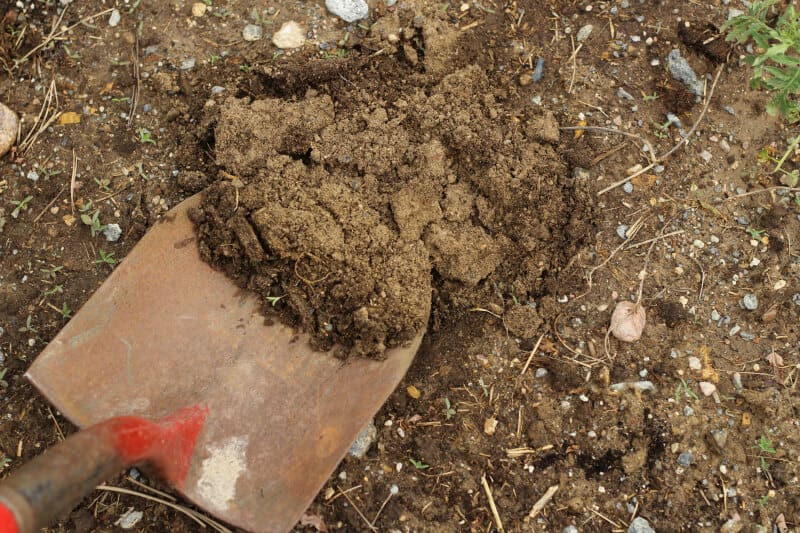
How I Collected My Soil Sample
Your soil test will come with directions, but from what I’ve seen, directions are generally the same:
- Dig down at least 6 inches.
- Combine samples from multiple areas of your garden
- Let the soil dry out completely before you package and mail it
Not too hard, eh? While the soil we filled our raised beds with was pretty similar from bed to bed, I still chose to dig samples from 4-5 different beds and combine them together in a bucket. I stuck them in the little plastic testing container, filled out the form, and within 2 weeks I had my results.

What We Learned from Testing Our Garden Soil
HOLY COW YOU GUYS.
I’m so glad I did this.
I was getting ready to add a whole bunch of composted manure to my beds in another month or so, and I’m so glad I had it tested BEFORE I did that. The most notable thing the results revealed was that my soil is already very high in nitrate-nitrogen (108 ppm), which can cause bushy plants with small fruit and stunted roots. Thanks to my soil test, I will NOT be adding any more composted manure to my beds this year (which also saves me a ton of work– whoop whoop). The notes also mentioned that early planting in the spring will help to make use of the additional nitrogen, so I’m crossing my fingers we won’t have issues.
Other things I learned from our soil test:
pH= Ours is high at 7.8. However, CSU said the most plants will tolerate this higher pH will little problem.
Electrical Conductivity or Salts= Ours are low at 1.9 mmhos/cm. When E.C. is less than 2.0, salinity is not a problem for plant growth. However, avoid adding large amounts of manure or composted manure since these are often very salty and can damage plants.
Lime= Our lime levels are high at 2%-5%. (I have never added lime amendments, so this is naturally occurring.) According to CSU, plants can still grow quite well in soil with this lime content.
Texture Estimate= Our soil is sandy loam, which means it will drain at a medium to high rate, which may cause it to dry out rapidly. Raised beds cause soil to dry out faster anyway, so I’m glad we have our built-in drip system.
Organic Material= Ours is high at 9.7%. According to CSU, we don’t need to build up the organic matter beyond its existing levels, but rather focus on protecting and replenishing the OM content by using organic mulch.
Phosophorus= Ours is high at 111.3 ppm. This is naturally occurring in our soil.
Potassium= Ours is high at 3485 ppm. This is naturally occurring in our soil.
Zinc= Ours is adequate at 9.2 ppm. No additional zinc is needed.
Iron= Ours is low at 7.3 ppm. CSU recommended that we add 2 ounces of iron per 1000 square feet. This was interesting, as my bean plants really struggled last year and were the weirdest shade of yellow. After a little research, I discovered this was a symptom of iron deficiency, which now makes complete sense.
Manganese= Ours is adequate at 6.6 ppm. No additional manganese is needed.
Copper= Ours is adequate at 2.4 ppm. No additional copper is needed.
Boron= Ours is high at 0.50 ppm. No additional boron is needed.

What I’m Doing with This Info:
Well, first off, I’m most definitely NOT adding any more compost to my beds– at least for this year.
Secondly, I’m on the hunt for some organic straw to use as mulch to help protect and preserve the organic matter in the soil (I unfortunately won’t be using hay anymore, due to the issue of herbicides).
And lastly, I am researching what sort of iron will be best to add to the garden to hopefully prevent yellow bean plants again this year. Some people say you can simply add rusty metal to your soil (??), but I think I’ll probably just use granulated or powdered iron that I’ll get from…. well, I’m not sure yet.
Suffice to say, I’m pretty much sold on this whole soil testing thing– best $35 bucks I’ve spent!
Have you ever had your garden soil tested? Comment below and share what you learned in the process!
 Other Posts to Help Your Spring Gardening:
- 7 Ways to Improve Your Garden Soil
- How Much to Plant for Your Family
- Where I Buy Heirloom Seeds
- How to Test Seeds for Viability
The post What We Learned by Having Our Garden Soil Tested appeared first on The Prairie Homestead.
Via Gardening http://www.rssmix.com/
No comments:
Post a Comment